Collaboration 3D Ceramic Printing part 2

This is part 2 of the collaboration with Brielle, Carmen, Keven, and Nicole. We have some samples of the computer samples, so that is very exciting. Also, Keven is planning on doing a mug which I can't wait to see.
There are some videos later in the post, and I'm not sure what the sound or volume will be like, so please be careful. Or just watch them without sound.
First up for this update is Brielle. Brielle was planning on creating a mug for the sample, and it is looking good. It seemed to print without too much difficulty. It is also pretty close to the rendered model which is also nice. No bubble farts (from the printer), and a nice seam line. Brielle also took a small video of the printing which is below.


Up next is Carmen. Carmen was planning on creating a cube like object for the sample and the printing had some challenges, but Carmen was ready for them. When printing, the infill was overflowing a bit into the outer layer which would catch on the printer nozzle and get dragged around. This was fixed with a change in printing speed. There was also an issue with the print wanting to start at the top of the print rather than the base layer, but a simple reverse in the g-code set up in Grasshopper fixed that. There is also a video of Carmen's sample printing below. I also give kudos to Carmen for the toolpath which looks like a headache until the first couple of layers were figured out.


Next is Nicole who was also looking to do a mug that was quite different from Brielle's mug. Nicole had to resize the mug because the first print was rather small. The fix was worth it though. It looks amazing, and that size difference shows how much detail can change. One thing that both Nicole and I learned from the mug is that in order to print a base layer, the distance between tool path must take into account the nozzle size. Since the nozzle used was a 5mm, the lines for the base layer needed to be 5mm apart, but the ascending layers of the walls will still be 1.5mm apart.


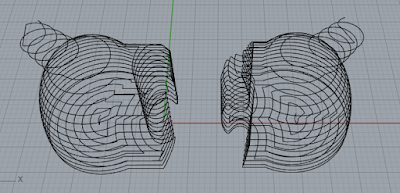
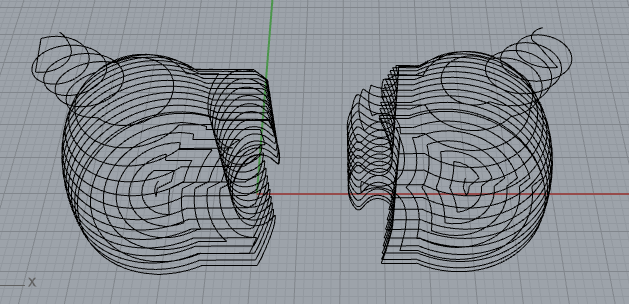
Last, but not least, once again, is me. I have had a lot of trouble with getting all of the logistics done. I did the spiral to get the lines toolpath, but it had a lot of very small overlapping corners and small pieces missing. There was about 40minutes of zooming in and out, Trim, Polyline and Join. I also had to fix the bottom a couple of times for the base thickness like Nicole's mug, and reverse the starting point like Carmen's cube like object. After a lot of fixing, I got it printed, but it was a lot smaller than what I thought it was going to be. I did resize it once before... I hope it will look more like the render if I resize it, but at least I now know that the print toolpath works.


We also have gotten our collaboration project pretty much figured out for the qualities that we want. It is going to be a combination of all of the aspects of our samples that we were wanting to explore. For Brielle, Nicole, and Keven, they will be making some mugs while Carmen and I will be working on an interlocking tray that will have specific indents for each mug.
We were struggling with visualizing the collaboration project ideas, so we decided to create some examples of project potentials. It was pretty cool to see/hear that we were pretty much on the same page. I made a simplified render of the idea which brings the idea across, but isn't what we're going for.

There are some videos later in the post, and I'm not sure what the sound or volume will be like, so please be careful. Or just watch them without sound.
First up for this update is Brielle. Brielle was planning on creating a mug for the sample, and it is looking good. It seemed to print without too much difficulty. It is also pretty close to the rendered model which is also nice. No bubble farts (from the printer), and a nice seam line. Brielle also took a small video of the printing which is below.


Next is Nicole who was also looking to do a mug that was quite different from Brielle's mug. Nicole had to resize the mug because the first print was rather small. The fix was worth it though. It looks amazing, and that size difference shows how much detail can change. One thing that both Nicole and I learned from the mug is that in order to print a base layer, the distance between tool path must take into account the nozzle size. Since the nozzle used was a 5mm, the lines for the base layer needed to be 5mm apart, but the ascending layers of the walls will still be 1.5mm apart.


Last, but not least, once again, is me. I have had a lot of trouble with getting all of the logistics done. I did the spiral to get the lines toolpath, but it had a lot of very small overlapping corners and small pieces missing. There was about 40minutes of zooming in and out, Trim, Polyline and Join. I also had to fix the bottom a couple of times for the base thickness like Nicole's mug, and reverse the starting point like Carmen's cube like object. After a lot of fixing, I got it printed, but it was a lot smaller than what I thought it was going to be. I did resize it once before... I hope it will look more like the render if I resize it, but at least I now know that the print toolpath works.


We were struggling with visualizing the collaboration project ideas, so we decided to create some examples of project potentials. It was pretty cool to see/hear that we were pretty much on the same page. I made a simplified render of the idea which brings the idea across, but isn't what we're going for.


Comments
Post a Comment